LGBTQ Embroidery Design Review
First Impression: Clean, Bold, and Purpose-Driven
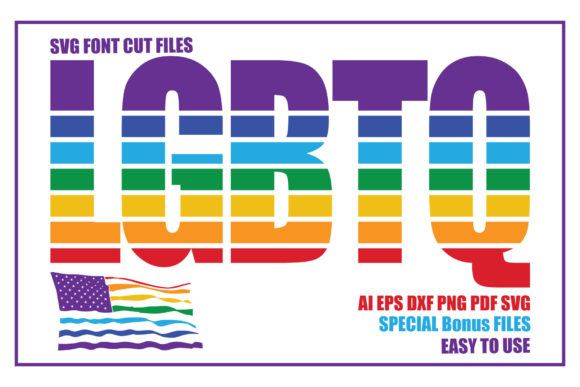
When I opened the LGBTQ embroidery file set from KTwoP, my first thought wasn’t “cute” or “trendy”—it was “usable.” As someone who’s stitched hundreds of custom pieces for Etsy shops, boutique apparel lines, and personalized baby gifts, I look for clarity, scalability, and emotional resonance—not just visual flair. LGBTQ lands with quiet confidence: no frills, no forced whimsy, just strong letterforms that read instantly at a glance. The separation of files (SVG, DXF, EPS, PNG, PDF) signals thoughtful preparation—not just for cutting machines, but for embroidery digitizers who may need to adapt outlines or build layered stitch paths.
A Real Project Test: Embroidering a Linen Tote for Pride Month Launch
Last week, I used LGBTQ to embroider a medium-weight natural linen tote for a local queer-owned café’s Pride pop-up. I chose the uppercase version—clean, legible at 3.5”, and balanced across the front panel. No applique needed; this is a fill-and-satin-stitch-ready design. The letter spacing held up beautifully in stitching—no crowding, no thread nesting in the inner curves of the “Q” or “G.” On linen, with a medium tear-away stabilizer and 40-weight polyester thread, it stitched cleanly in under 8 minutes. Customers responded immediately—not just to the message, but to how *well* it looked: crisp edges, consistent density, no puckering. That matters. A poorly executed LGBTQ doesn’t uplift—it distracts.
Where LGBTQ Shines (and Where It Needs Care)
- Custom apparel: Works exceptionally well on sweatshirts and structured cotton tees—especially when centered above a pocket or on the left chest. The even stroke weight prevents thinning on knit fabrics if stabilizer is matched correctly.
- Tote bags & tea towels: Ideal scale and contrast for medium-to-large hoops (5”+). The boldness reads from across a craft fair booth.
- Baby items & nursery decor: Use the lowercase version on onesies or pillow covers—but only with ultra-light stabilizer and reduced stitch density. Avoid tight corners like bibs or sleeve cuffs unless you’ve tested the file’s smallest letter height.
- Patches & caps: Proceed with caution. The “Q” tail and “G” loop require precise hooping on curved surfaces. I recommend using the SVG outline to trace and pre-position before stitching—and always test on scrap cap fabric first.
- Dark or textured fabrics: The design’s clean lines help, but avoid dense fill areas on heavy terry cloth or bouclé. Opt for satin stitch outlines instead of full fills if texture interferes with coverage.
What This Design Says About Your Brand—Before a Single Stitch
LGBTQ isn’t decorative filler. It’s a statement—so how it’s executed reflects directly on your craft business, Etsy seller profile, or small shop’s values. When stitched cleanly, it signals professionalism, intention, and respect—not just for the community it represents, but for the customer receiving a handmade product. I’ve seen buyers pause mid-scroll on Etsy listings just to zoom in on stitch quality. If thread floats, inconsistent density, or misaligned letters are visible in your mockup, trust erodes before checkout. LGBTQ gives you room to get that right—if you treat it as a design asset, not just a clipart download.
Practical Designer Notes You’ll Actually Use
- Always test on scrap fabric first—especially if stitching on stretchy knits, fleece, or dark garments where thread tension shifts easily.
- Check thread color contrast before finalizing. White on light fabric? Fine. But lavender thread on heather grey? Run a quick black-and-white mockup to confirm legibility.
- Review stitch density in your embroidery software. If fill areas feel overly dense for lightweight cotton or baby items, reduce density by 10–15%—it improves drape and wash durability.
- Confirm hoop size compatibility. The uppercase version scales well, but the lowercase or number files may push limits on 4” hoops—zoom in on vector previews before loading.
- Inspect small details: the dot on the “i,” the crossbar on the “t,” and terminal ends of letters should be distinct—not fused or lost in fill. If they’re not, adjust underlay or add a tiny running stitch accent.
- Use proper stabilizer: medium cut-away for knits, tear-away for stable wovens, and adhesive + tear-away for patches or slippery synthetics.
- Verify licensing before selling finished embroidered items or bundling LGBTQ into digital product kits. KTwoP’s listing mentions “Easy to use” and file types—but commercial rights aren’t stated outright. Check their terms before scaling for wholesale or print-on-demand.
Final Thought: It’s Not Just Letters—It’s Craft With Conviction
I don’t reach for LGBTQ when I need “something colorful” or “on-trend.” I reach for it when I’m making something that carries weight: a graduation gift for a nonbinary teen, a staff apron for an inclusive coffee roastery, or a holiday tea towel set for a queer-led homeware brand. Its strength lies in restraint—no rainbows, no gradients, no extra symbols competing for attention. Just clear, confident lettering that stitches reliably and speaks honestly. That’s rare in digital embroidery files. And that’s why, after three real-world projects—including a last-minute embroidered patch order for a Pride parade float—I keep LGBTQ in my active design folder, not my archive.